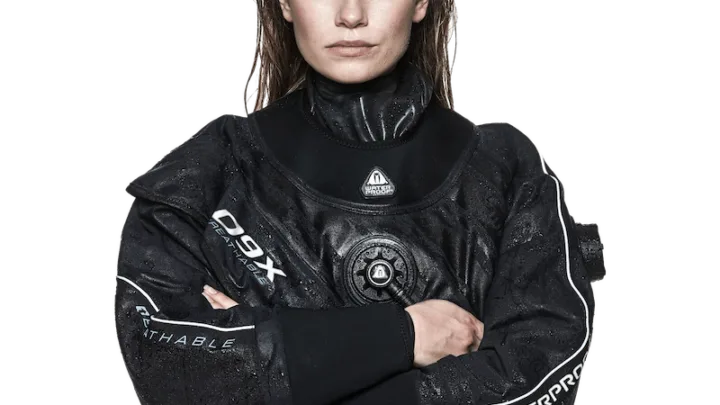
Fancy opening up a whole new world of dive sites? Whether it’s exploring lakes in the northern hemisphere or even plunging under ice, learning to dive in a drysuit can give you the option to scuba dive in some of the coldest of waters.
Read on as Girls that Scuba member Suzie shares everything you need to know about drysuit diving.
What is Drysuit Diving?
As most divers will know, water conducts heat away from the body at least 20 times faster than in air. So when diving in cold water (your personal tolerance to cold may be different, but this could be anything below 21ºC or 70ºF) we must use the correct exposure suit in order to achieve a comfortable dive and protect ourselves from hypothermia.
A dry suit does exactly this. It keeps water out, and it also keeps us warm by using a layer of air around the body.
Why go Drysuit Diving?
It’s not always easy to get to those exotic destinations we dream about diving in, so sometimes we have to go with what’s local to cure our bubble-blowing cravings – and local sometimes mean cold!
However, there are some fantastic dives around the world from the Arctic to Antarctic that can only be reached in a dry suit, and by learning this new skill it opens up diving all year round and anywhere in the world.
Dry suit diving in the UK offers everything from diving with seals in the Farne Islands, to wreck diving in Scapa Flow, and even diving with basking sharks in Oban.

Drysuit Training
Yes, you do need training when diving in a dry suit. Dry suits are another piece of equipment to think about whilst diving and so you must learn how to use them correctly in order to have a safe and fun dive.
They can be used for buoyancy control and require more weight to be added as they are much more buoyant than a wetsuit. There are also safety issues you need to take into consideration. For this reason, it is strongly recommended that you complete a dry suit orientation dive in a confined environment with a certified professional.
We would also recommend completing a dry suit specialty course, which consists of a confined session and two open water dives getting comfortable with your dry suit. This is a fun and fairly straightforward course that can be done in one or two days.
7 of the Best Women’s Drysuit Brands
Trying On a Drysuit
Lots of people will give you information on types of suits, but not enough people give you advice on how to try them on. When going to buy or rent a drysuit, wear what you are going to wear under the suit on a dive.
We love Fourth Element’s Arctic sets, but you can get many different types of undersuits – from thick quilted onesies aimed at the trilaminate suits to thin ones complementing the neoprene suits.
Step 1
With your undersuit on, open the dry suit and hold the waist from the inside. More often than not there will be shoulder straps so get them out of the way. Sit down if you can and put both feet in and stand up.
Step 2
Pop the shoulder straps on and adjust until you’re comfortable.
Step 3
If you are donning a suit with latex seals I recommend you put some talc powder around your wrists and into the seals. This will help glide them on. We tend to suggest putting both hands in at the same time and stretching up for them to hopefully slide on.
For neoprene seals you will need something a little more gloopy so as not to damage the seals – O’Three Jollop works for this. A small squirt in each seal will help immensely.
Step 4
Next, it’s the neck seal and, as many instructors I know say, it feels like being born again! With both hands hold the neck seal on the outside and stretch slightly and pull up and over and push your head through. You must take out all of you hair from the neck seal or it won’t be watertight and will be uncomfortable for you. People with long hair – tie it up.
If you have a latex neck seal make sure it is flat against your neck and tight enough to keep water out, but not enough for it to be uncomfortable or restricting anything. If your face turns red, it’s too tight!
Neoprene neck seals are much longer for a reason and need to be folded in on themselves in order to make a seal with your skin. At this point ask a friend to zip up the shoulder zip making sure it is completely closed.
Step 5
To complete the job and get the right feel for the suit you should also place one finger into the neck seal of your suit and bend down to the ground and give yourself a hug. This lets out all the trapped air in the suit. Let go of the neck seal and stand up – you will be shrink-wrapped and ready to go.
What to Consider When Purchasing a Drysuit
Drysuits are expensive pieces of equipment, so it is important to consider a few things when choosing to purchase your own.
Materials
There are many different dry suit materials (neoprene, crushed neoprene, vulcanised rubber, trilaminate) but nowadays for recreational dry suit diving there are 2 main types – neoprene and membrane/trilaminate.
Trilaminate is made up of three layers as the name suggests and will keep you dry but does not give much insulation. Cordura or membrane types are particularly robust and are often used as school suits for this reason. These have a generally looser fit on the body to allow you to add more insulation underneath.
Crushed neoprene is thicker and has better insulating qualities than a trilaminate suit so will keep you warmer with minimal undersuit. It is a much more fitted suit and we find it much easier to move in, but it is easier to damage/puncture.
Read more on choosing the perfect drysuit here!
When choosing a suit it comes down to personal preference, as we found after learning in a membrane suit we quickly jumped to our own neoprene suit as soon as we could afford it and loved the warmth and freedom of movement.
Our best advice would be to try them on. Most shop staff will be happy to help and have a wealth of knowledge to help you decide. Other than the material there are three main suit components that help keep you dry – neck and wrist seals, dry zip and valves.
Seals
They are 2 types of seals – neoprene (mainly found on the neoprene suits) and latex (mainly found on membrane and trilaminate suits). However, latex can cause allergies so some companies are turning to the more comfortable neoprene alternatives.
The neoprene seals can also be made to measure by a technician. The main purpose of the seal is to keep the suit watertight and so these should be a snug fit but not uncomfortably tight.
Dry Zip
The dry zip comes from a design used on space suits. It is very important and is the most expensive part of your suit to replace – so take care of it by washing it with fresh water and keeping it lubricated.
There are front entry zips, U-zips and shoulder zips. There are also “relief zippers” for use on the surface, but these won’t be as useful to women unless you have the use of a Shewee (a portable device not to be confused with the She-P – more on that in a moment).
Valves
A dry suit will have an inflator at the front of the suit which connects to a low-pressure quick release hose on your regulator. This is used to insert air into your suit to give you warmth and also for buoyancy control.
Dry suits also have an air dump which will either be a shoulder or a cuff dump. These allow you to dump air in order to control buoyancy. To use these correctly it is best that you seek a lesson from a professional.
Finally, you can choose to add a p-valve to be able to urinate whilst underwater. This needs to be used in combination with a device called a She-P.
Boots or Socks
Some suits come with neoprene socks, and you can wear rock boots or wetsuit boots on top. Other suits come with full boots attached. If any damage occurs it will usually cost you less to replace neoprene socks than it will to replace full boots.
Alterations
Suits can be altered to help make them a better fit for an individual. For example changing cuff and neck seals both latex and neoprene, or changing boot sizes.
Repairs and replacements can also be made and I would urge you to have these done by a certified professional as your dry suit is an important piece of equipment to keep you safe. This article contains more advice on custom sizing for drysuits.
Extra Advice
Be sure to remove jewellery, particularly earrings and rings, as they may get caught and tear drysuit seals when donning and doffing the suit.
Remember, drysuits need routine maintenance and regular servicing. Take it in to have the valve and zippers checked and cleaned, and to have the drysuit pressure tested. Make sure to clean your drysuit with fresh water after dives like all the rest of your dive equipment.
The Best Women’s Drysuit Brands
With a thriving community of tens of thousands of women, we see conversations on a daily basis discussing the best brands in scuba diving.
We’ve put together a full guide to some of the most highly recommended women’s drysuit brands from the Girls that Scuba community, including brands such as Santi, Otter, O’Three and Fourth Element.
Drysuit Accessories
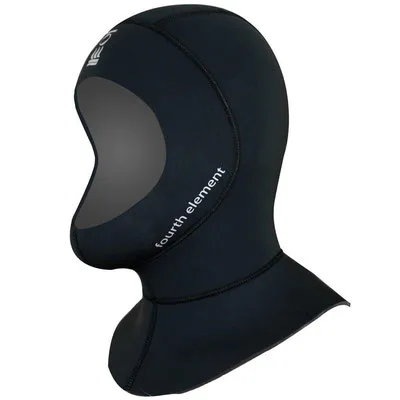
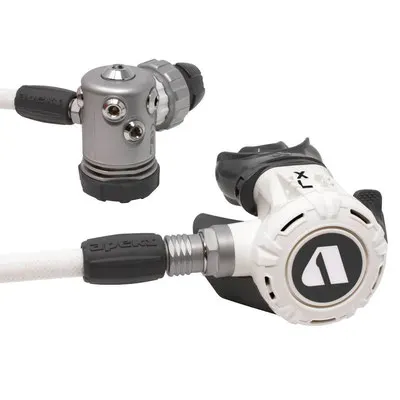
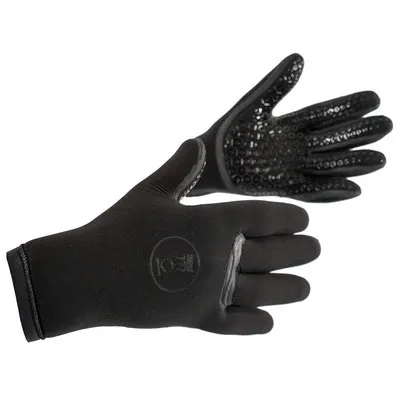
Other equipment to think about for cold water dives are hoods and gloves, weight systems (as you will be wearing more weight than in a dry suit), and regulators rated for cold water use. Some of our favourites are linked in the images below.
Final Thoughts on Cold Water Diving
Our contributor Suzie was lucky to have completed her Open Water Course in a drysuit, and she would encourage those especially in the UK to learn there as they have some fantastic sites. It also means you get the best of both worlds from the very beginning of your scuba diving journey.
To all the holiday divers out there, give the drysuit a shot. We’re sure you will be pleasantly surprised by what the cold water diving scene has to offer – and the buddies you will make who share your passion will be priceless!

About the Author
Suzie Glattbach is a Scottish PADI Diving Instructor and Service Technician with a passion for marine life, conservation and education.

