
We’ve all heard the saying that “there are two types of diver – those who pee in their wetsuits, and those who lie about it”. However, when you find yourself in a drysuit, peeing in your suit is no longer an option. That is, until you learn about the wonders of a She-P and the female drysuit p-valve.
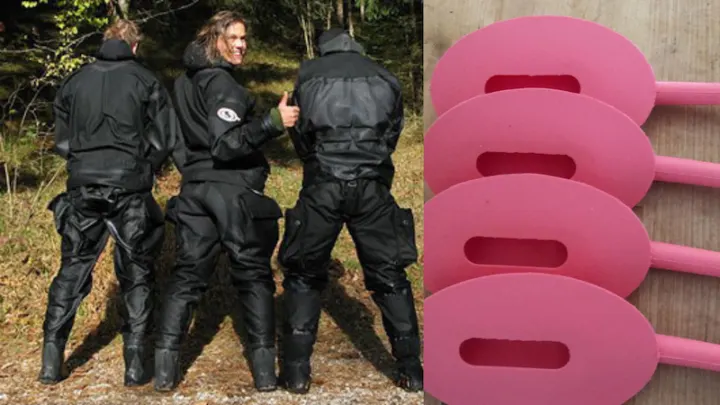
Back in 2006, avid cave diver Heleen was fed up of being stuck with dehydration or diapers as her two options for long dives, whilst male buddies peed freely with their condom catheters and p-valves. So she created her own solution. Heleen’s She-P has come a long way from the early latex models tested amongst her friends, and nowadays it’s a modern medical grade silicone device which allows anyone with a vulva to urinate freely underwater whilst wearing a drysuit.
The She-P and p-valves certainly require something of a learning curve, but the freedom provided by them is a huge advantage to anyone wanting to spend longer underwater. Read on to learn the benefits of female drysuit p-valves, how to use a She-P, and where to get your own.
Why use a p-valve?
As anyone who’s ever done the awkward post-dive “can’t-remove-my-drysuit-quick-enough” dance knows, the primary reason you’d want to use a p-valve is comfort. However, there are numerous other benefits that come along with being able to relieve yourself underwater.
If you’re going into a day of drysuit diving knowing you’re not going to be able to urinate underwater, it’s likely that (consciously or subconsciously) you’ll drink less water than you might if you knew you could pee freely. Being properly hydrated is incredibly important for the human body to be able to function at its best, particularly for scuba divers. Hydrated divers reduce their risk of decompression sickness, and if you suffer from seasickness you may also find this is reduced when you’re fully hydrated.
In the past, divers overcame the hydration issue by resorting to diapers or other incontinence underwear with their drysuits. However, these have their own drawbacks. Not only are diapers uncomfortable, unreliable, and a potential risk for infection when worn for hours on end (as can be the case in tech and cave diving scenarios), they’re not the best option environmentally, either. A device which can be worn and reused for every single dive is a much better long-term solution.
As well as avoiding the desperate need to pee when you return to the surface, the ability to relieve yourself during the dive means one less thing to worry about underwater. It might seem like a minor worry, but less mental stress and anxiety on a dive makes for happier, safer divers.
Finally, installing a p-valve means that you can pee between dives without having to fully remove your suit. No more hovering awkwardly over the side of a boat or trying to squat in odd positions on cold diving days whilst simultaneously attempting to keep warm and not pee on your exposure suit. Even once your suit is removed all your dreams of peeing standing up can finally come true, and you no longer have to avoid that shore diving site with the questionable facilities!
How do I use a She-P?

Install a p-valve
Of course in order to use a She-P, you’ll need to have a p-valve fitted to your drysuit as an outlet to attach the hose to. Some say that handy divers can install one themselves, however, having it fitted by a professional is your best bet for leak-free peace of mind. A balanced p-valve is recommended to avoid potential squeeze situations caused by air spaces in the hoses (ouch!) – many She-P users have success with the Halcyon balanced valve.
Simple step-by-step She-P application
Preparation – Unless you fancy a free waxing experience when you remove your She-P, a little bit of hair removal is necessary to prepare for application. A closer shave will give a more secure seal, but a very short trim will suffice if you don’t want to remove all of your hair. Any hair removal method will work, but be mindful of timing if you choose to wax as the adhesives may not stick correctly to any waxy residue. If you choose to shave, avoid razors with “moisturising strips” or similar built in, as these can have the same anti-adhesive effect. Keeping it simple with a classic safety razor will help you avoid this issue.
Adhesive – Using one of the two recommended products (Urobond brush on adhesive or Hollister spray adhesive) apply a generous coat to the contact surface of the She-P. Many who use the spray also spray a layer the night before, allow it to go tacky, and then re-spray just prior to application. Some also apply a thin layer of adhesive directly to the skin but this is more suited to the Urobond – if you choose to do this with the Hollister spray, spray onto a finger first and then gently apply to the skin.
Apply – Holding the back firmly in place (as far back as anatomically possible), apply the She-P from back to front. Once in place, hold for 30 seconds to ensure a strong seal. Pay particular attention to the back, as this is where many people experience leaks. Take the time at this point to move around a little and feel for pinching; if it’s uncomfortable now, it certainly won’t feel better underwater! The adhesives can be gently peeled and replaced if you’re not quite comfortable.
Secure – You can secure the She-P in place either with a few pieces of tape (again paying particular attention to the back) or by wearing two g-strings/thongs, one sitting either side of the device. Many people then wear a pair of shorts-style underwear to secure the hose pointing upwards towards the stomach. For extra security during that all-important learning curve, you may want to wear an absorbent sanitary towel or incontinence underwear, however, one of the benefits of opting for this system is avoiding the environmental downsides of these disposable products.
Connect and “prime” – Time to plug it all in! Connect the She-P hose to your p-valve, and don’t forget to open the p-valve before you enter the water. You want to check it’s working correctly before you jump in, so take an opportunity to pee before your dive. Many users also refer to “priming” early in the dive by peeing either at the surface or on descent, to ensure those pesky squeeze-causing air spaces are all eliminated.
This video by She-P distributor Laura shows a fantastic step-by-step application on an anatomically correct model, with a good dose of humour to help you along on the journey. We highly recommend part two to see Laura’s blue-wig-sporting “mini-me” demonstrating optimal positions for She-P application.
Removal
Once you’ve finished your well-hydrated, comfortable, free-peeing dive, you need to disconnect and remove the She-P. You can install a quick disconnect hose to simplify this, otherwise be sure to have a plug or some tape on hand to close off the She-P hose as you get changed following the dive.
Many users wait until they get to a shower to remove the She-P from the skin, as the warmth can aid in loosening up the adhesive. Remove the contact area carefully, as the soft silicone can tear if handled roughly. The best angle for removing the adhesive is 90° from the skin as this is the weakest point of the adhesive. You can use adhesive removal pads to saturate any remaining adhesive on both your skin and the device, and baby oil can also help to shift any stubborn glue on the skin. However, remember to clean this from your skin thoroughly before your next dive to allow the adhesive to stick again.
These pieces of equipment are literally being stuck to your body, so cleanliness and hygienic practice is paramount to avoiding uncomfortable infections. This applies to your She-P, which should be cleaned thoroughly and stored appropriately, and also to the p-valve on your drysuit which should be flushed thoroughly with clean water and a little vinegar or disinfectant solution. If you choose to remove the She-P at the dive site before cleaning it more thoroughly when you get home, a quick interim clean with a gentle soap and water is perfectly acceptable.
Where can I get a She-P?
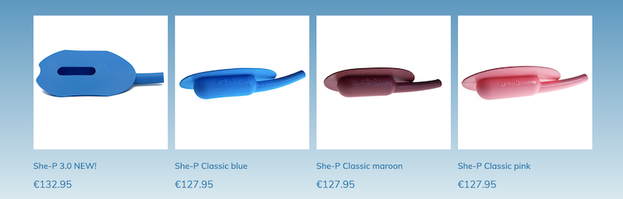
Now that the benefits of staying fully hydrated whilst diving and avoiding uncomfortable diapers have got you convinced, you’re probably wondering where you can get your own She-P. The She-P website has a full list of dealers spanning 32 countries to allow you to find one as close to home as possible.
Resources and further reading
The She-P website offers up a wealth of knowledge whilst getting started on your p-valve journey. Their FAQs are a particularly great place to start, covering everything from whether you need to practice peeing during a dive, to whether you can use a She-P in combination with a menstrual cup (yes, you can!) and even whether you can use one if you have intimate piercings.
Of course, we’re huge advocates for a flourishing Facebook community, and She-P have their very own in the form of “The divine secrets of the She-P sisterhood”. Absolutely no question is off limits, and this interactive and responsive community is on hand with their wisdom to respond to any questions on your She-P journey. We can’t give all their secrets away, so be sure to head their way if you’re eager to learn more.
Have you ever used a She-P? What advice would you give to a beginner? Let us know in the comments below, or share your She-P experience with our Girls that Scuba Facebook community!