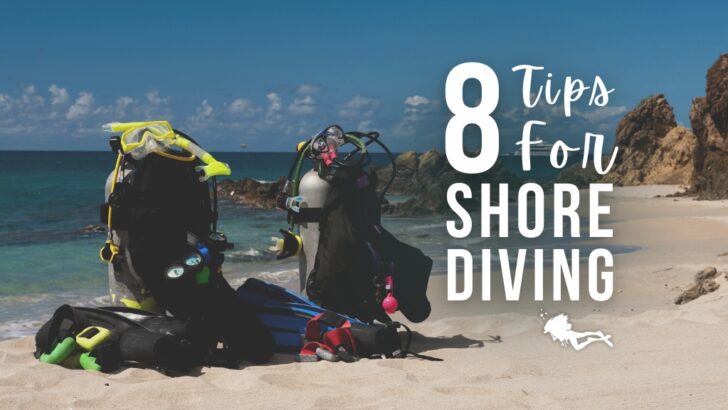

There are often awesome dive sites to be found by jumping on a boat and heading out into the blue. But some of the best sites can be accessed by literally walking out into the water! Shore diving can open up a whole load of new sites to you, particularly if you’re becoming more familiar with diving in your local area.
However, if all of your diving so far has been from a boat it may take some getting used to. We’re here to help you out with our eight top tips to consider when shore diving. Read on for the handy equipment which will help you out. We also share how to stay fit for long walks in your equipment, and how to keep safe whilst diving from the shore.
1. Get the right scuba gear
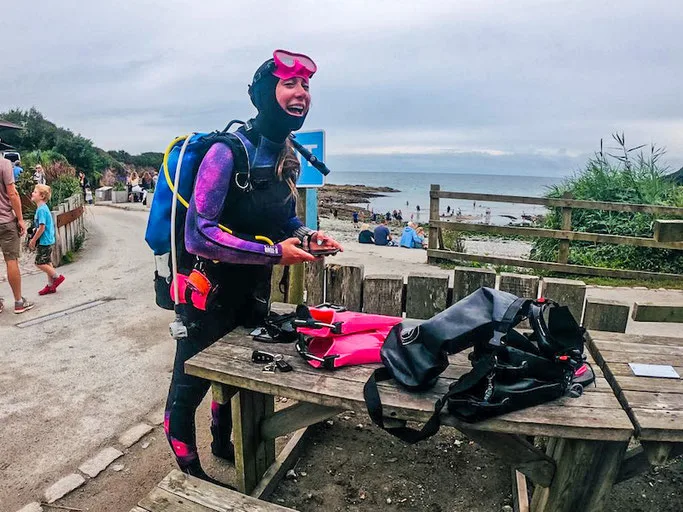
Don’t stress – we’re not about to tell you that you need a whole new setup of equipment for shore diving. However, there are a few pieces of equipment which will make your life a lot easier when it comes to shore dives – particularly for gearing up and changing post-dive. GTS founder Sarah into UK diving this year, and shared some of her shore diving equipment faves with us.
If you’re doing lots of shore diving this may affect the style of fins you want to choose. Even if you’re diving in warmer waters, consider an open heeled fin and dive boots rather than full foot fins. This will keep your feet protected from rocks or critters such as urchins. You can level this up further by choosing a sturdy boot with a more substantial sole.
2. Be fit to dive
If you’re diving regularly you should definitely be keeping on top of your fitness levels, whether you’re diving from boat or shore. You don’t need to be a top level athlete, but there are a myriad of benefits to being dive-fit. These include decreased risk of decompression sickness and better air consumption. You’ll also be more prepared to cope with challenging situations such as unexpected currents.
When you’re diving from a boat you’re usually given the luxury of being dropped off and picked up right on top of your dive site. You rarely have to carry your equipment further than a few steps from your seat to the back of the boat.
With shore diving you’ll often find yourself carrying your cylinder and weights a fair distance. Sometimes this could even be up and down stairs or across treacherous rocks. This could be a shock to the system if your fitness level is lacking.
You may also have to swim a few hundred metres at the surface at the beginning and end of your dives if the dive site is further out. If you’re not used to swimming in full gear it can definitely be tiresome.
We’re not expecting you to be an Olympian, but a bit of activity in your everyday life will make shore diving easier. Whether it’s walking, dancing, cycling, running or swimming, anything which increases your heart rate a few times a week will help. You don’t need to be in the gym 6 hours a day, but lifting weights will also improve your dive fitness.
3. Master your entries

Shore entries aren’t always as graceful as a backroll or a giant stride. Before you walk in, take a look at the conditions to work out the best approach. Look out for any water movement at the surface. Swell, surf and surge will all change how you want to enter.
If the water is particularly rough, it may be easier to put on your fins (with your buddy’s help) on the shore and then walk into the water backwards. It may also be safer to put your mask on and have your regulator or snorkel in. This prevents water entering your airways. Remember to always enter with a partially inflated BCD, and fully inflate once you’re approaching waist depth in the water.
4. Plan your exits
Shore entries can be a bit of an adjustment. Add to that the tiredness of having completed a whole dive, and exits can be just as challenging. However, it doesn’t have to be intimidating – thinking ahead and planning your exits will make this much less daunting.
From a safety perspective, follow the entry advice from above. Keep your reg or snorkel in, mask on, remain fully inflated at the surface, and be aware of the conditions.
You and your buddy should be able to rely on one another when exiting. If you’re the stronger of your buddy pair, be prepared to assist them by stabilising their tank as they stand up. Just as you would when entering the water, you can lean on one another to remove equipment such as masks and fins once it’s safe to do so.
When it comes to exits, you also need to think about where you’re ending up. If it’s a drift dive (more on that later) you’ll need to plan for the walk back to your start point. When planning the dive, don’t forget that a long walk to the entry/exit will feel even longer after the dive than it did before!

5. Get comfortable with currents
Water movement will potentially have more of an impact on shore dives than it would on a boat dive. Learning a little more about currents will definitely make you more prepared for any adverse conditions when shore diving. Learn to recognise the signs of strong currents from the surface, and get to grips with the local knowledge to know the safe times to dive if the area is tidal. Generally it’s safest to dive an hour either side of high tide. However, this can vary so check in with a local dive operator if you’re unsure.
If you need to return to the same entry point at the end of your dive, remember to begin your dive by swimming against (into) the current. The current can then help push you back in your desired direction at the end of the dive. This is helpful when you have less air remaining and less energy to swim.
Alternatively, if it suits the dive site, you can let the current take you along for the ride. You can then walk back to your entry point once you’re out of the water. This is called drift diving.
Finally, familiarise yourself with what a rip tide looks like from the surface. Look out for calm-looking breaks in the surf. They may look inviting from the surface, but under the calm appearance there are strong currents pushing outwards perpendicular to the shore. Whilst this should have been covered in your Open Water Course, it’s a small piece of information and is easily forgotten. However, it’s information which could save your life by preventing you from being pushed out into the blue.
6. Carry a DSMB
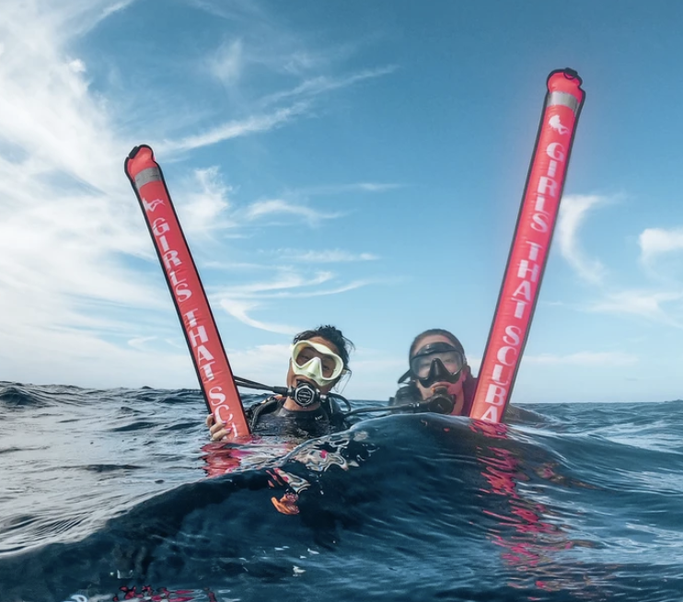

One thing which may help you in that unlikely situation is a surface marker buoy. Either an SMB, a DSMB (delayed surface marker buoy, deployed from underwater during your dive) or a dive float will mean that you can be seen from the surface.
In some locations it’s customary to tow a dive float for the entirety of your shore dive. This is especially common if there’s lots of boat traffic. The float or SMB makes sure it’s clear that there are divers under the water.
If you do choose to use a DSMB, make sure it’s bright enough to be visible from a distance, and ensure that it has a reflective panel which can be helpful in low light. Our very own GTS delayed surface marker buoy ticks both of these boxes! To add an extra layer of safety to your shore dives, consider carrying a PLB. These devices can be used to get help in an emergency if you’re swept out to sea.
7. Consider your exposure
We know we should always think about what exposure protection we need for under the water, but what effect does that exposure have when you’re walking to and from your shore dive entry point? If you’re bundled up in 7mm of neoprene or a drysuit and undergarments, it doesn’t take long for that to get pretty toasty. You might risk overheating, even if the air temperature seems cold.
If you’re walking a long distance in a lot of exposure protection, consider taking a short break for your body temperature to settle before getting into the water.
8. Remember surface support
In any diving situation your buddy is usually the most important person to think about. However, when you’re shore diving you need to think about who’s back on land to support you if needed. Consider taking along an additional non-diving buddy to be able to assist with carrying, donning, and doffing equipment. They’re also there if anything goes wrong. They can also keep hold of valuables such as mobile phones and car keys.
Consider preparing an emergency action plan. You might want to include:
- Local numbers for the coastguard
- Location of the nearest recompression chamber
- How to get to the chamber in an emergency
- Basic diving related first aid and CPR
- The location of an oxygen kit (or carry your own), and how to safely use it
- Location of the nearest AED (Automated External Defibrillator)
What’s your favourite tip for shore diving? Has shore diving opened up a whole new world of dive sites to you? Share it with the Girls that Scuba Facebook community!